When it comes to keeping your home watertight, few roofing components are as important (or misunderstood) as apron flashings. We’re often asked what they are, why they matter, and what can go wrong if they’re not installed properly — so let’s break it down.
What Is an Apron Flashing?
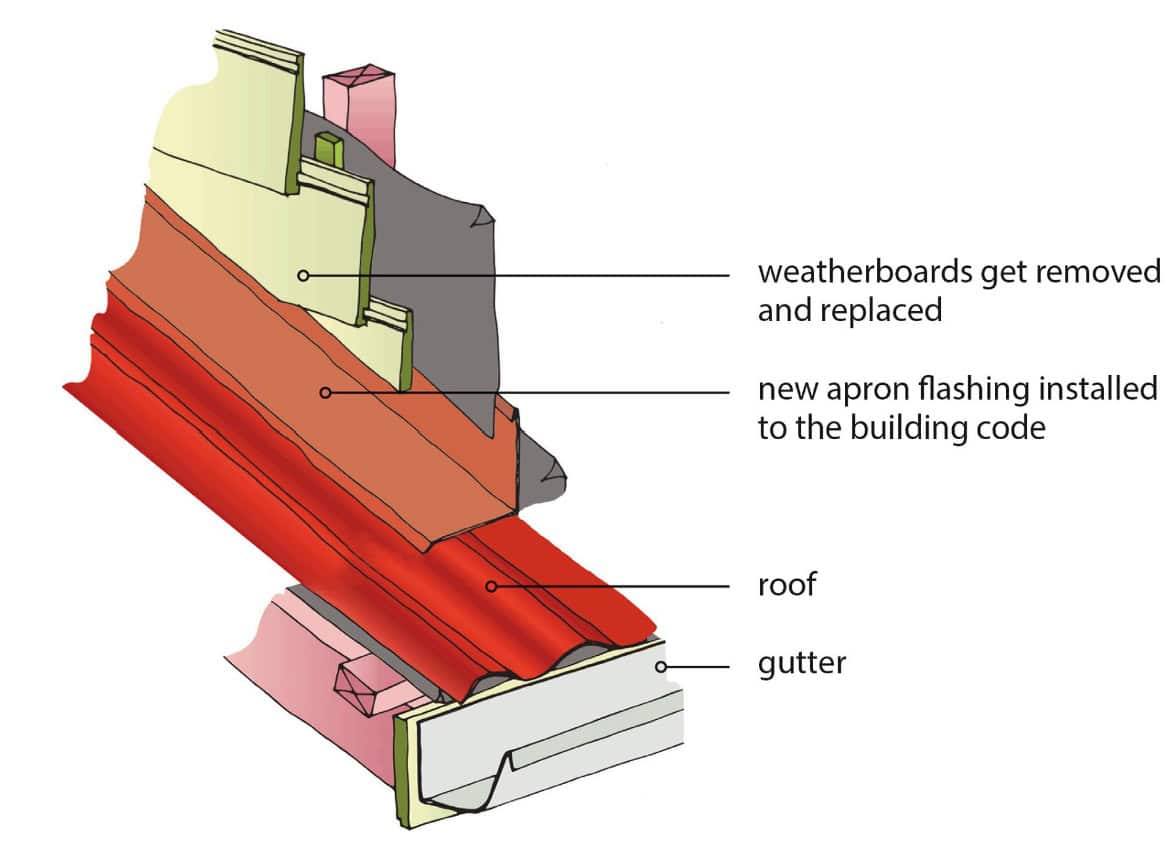
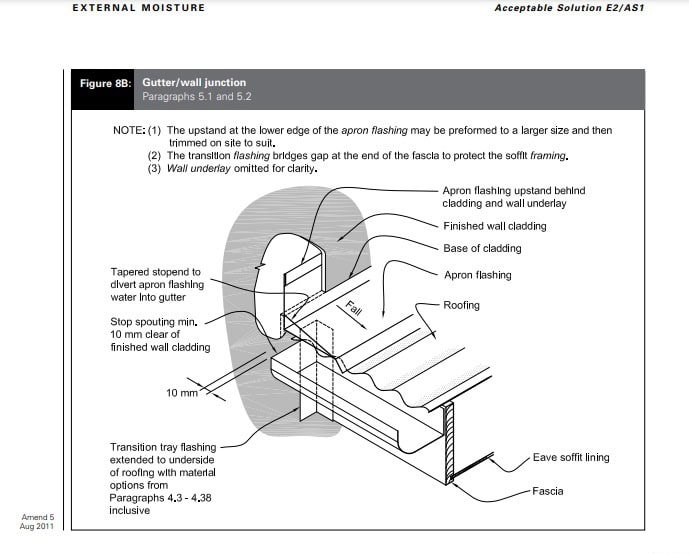
An apron flashing is an L-shaped piece of flashing used where a lower roof meets the wall of your home. Its job is simple but essential: to stop water from entering the house at this junction.
Installed correctly, the apron flashing sits on top of your roof, travels up the wall, and tucks in behind the building paper before your weatherboards are reinstalled. This creates a secure, watertight barrier — something we ensure on every job at Element Roofing.
What Good Looks Like
In a proper installation, you’ll see:
- A clean, continuous L-shaped flashing
- Building paper overlapping the flashing
- Pre-primed weatherboards installed with a gap above the flashing
- Everything sealed and ready for final paint
This method meets current building standards and gives your roof system the longevity it needs.
What NOT to Do
Unfortunately, we still come across a few common shortcuts that can cause big issues down the line. For example:
- Covering the Old Flashing: We’ve seen aesthetic “slither” flashings added over 50+ year-old apron flashings. The old metal is often corroded, especially where moisture and debris were trapped.
- Board Contact: Weatherboards sitting directly on the flashing hold moisture and debris — which accelerates rot and reduces the lifespan of the materials underneath.
- Layered Flashing Traps Moisture: Double layers of flashing can trap water and condensation between them. This increases the risk of failure and hidden damage behind your cladding.
These shortcuts might look okay on the surface, but they’re often picked up in building reports, council inspections, or when trying to sell your home — and they nearly always need to be redone.

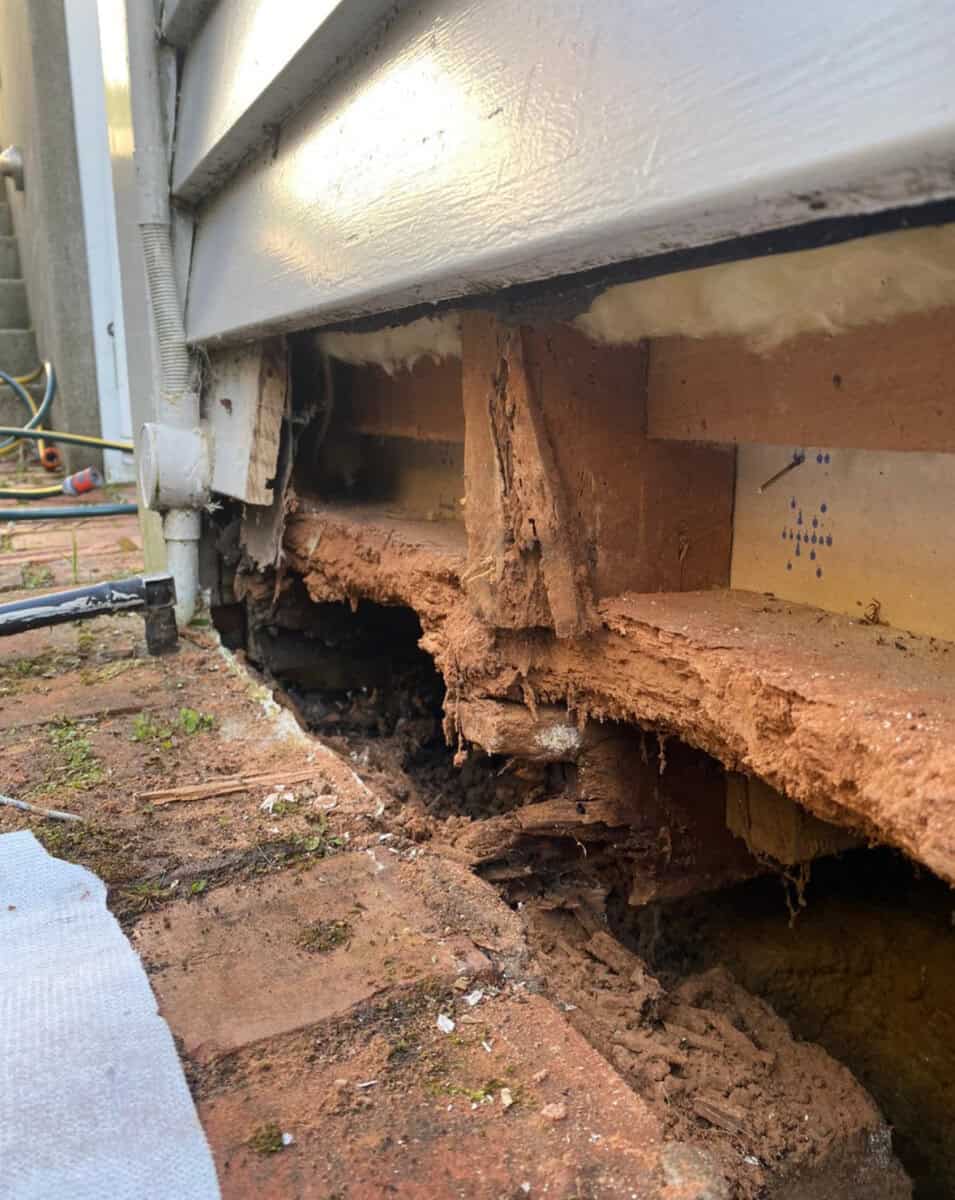
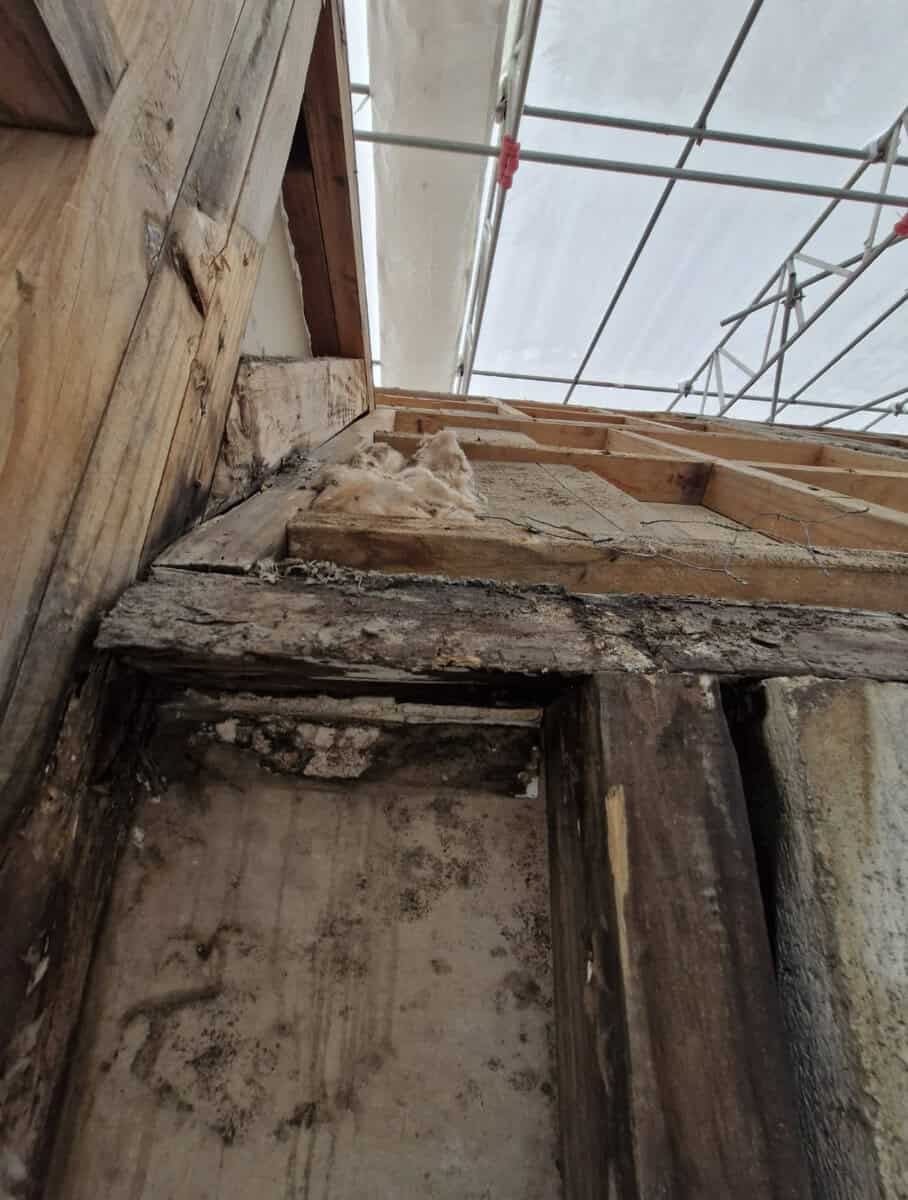
The Worst-Case Scenario
What’s the most serious consequence? Water ingress behind an old apron flashing that goes unnoticed for years — leading to rotten timber framing inside your wall. At that point, the repair bill grows significantly, and you may even be facing consent-related challenges.
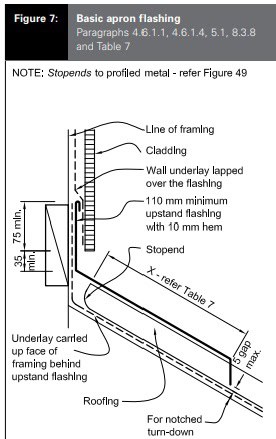
The Right Way – Backed by the Building Code
We always follow the best practice based on council guidelines and the external moisture code. Here’s what the minimum standard requires:
✅ A 35mm gap between the cladding and the apron surface
✅ At least 75mm of cover from the cladding over the flashing
✅ A 110mm minimum upstand on the apron flashing — with a hook at the top
✅ A turn-up diverter at the spouting end to direct water away from internal corners
These details aren’t just nice to have — they’re essential to your home’s weathertightness and compliance.
Final Thoughts
If you’re replacing your roof or renovating a section that involves apron flashings, don’t cut corners. These components are out of sight, but when done poorly, they can become a very expensive problem.
At Element Roofing, we do it right the first time — every time.
Got questions about your roof or flashings? Get in touch — we’re always happy to help.